
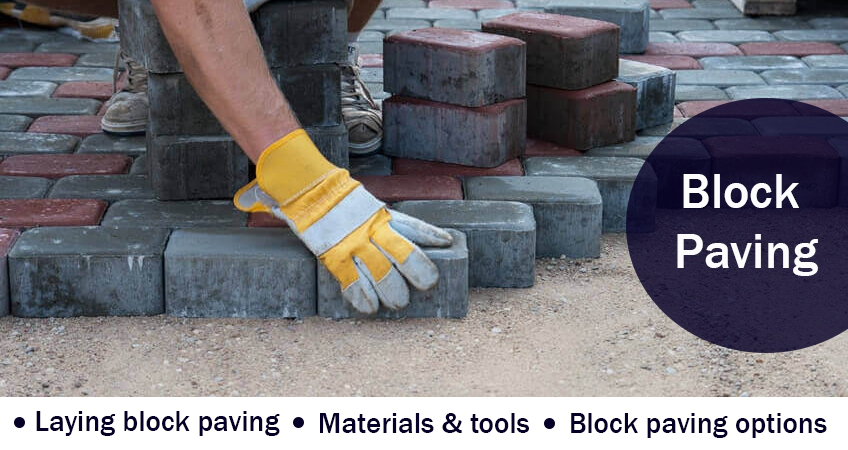
The ‘kerb appeal’ is an elusive animal. Some homeowners are happy with theirs but for most, their kerb’s looks are a source of dissatisfaction. But a major part of making a kerb look good lies in choosing the right paving materials and a proven paving service. And as far as paving material is concerned, paver blocks rank at the very top. There is a very good reason why they have grown in popularity across most of the UK. A block paving surface is practical, low cost and easy to maintain.
While the choice of material for paving your kerb is straightforward, choosing the right paving service could prove tricky. An alternative is to go on your own. Yes, with proper planning and the right tools, you can lay block paving by yourself. In fact, many consider learning how to lay block paving part of the quest to create their dream home and landscape.
But before we learn more about laying block paving on soil or concrete, there are a couple of things you need to figure out. Let’s begin with the tools you’ll need for the task.
Materials & tools needed
- Broom
- String line and pegs
- Rake
- Shovel / Spade
- Screed rails
- Mallet
- Spirit level
- Wheelbarrow
- Tape measure
You can either borrow or buy these tools outright. However, you definitely need to hire the below machines as they are too expensive to buy, not to mention they won’t be used again for a long time either. These include,
- Cement mixer
- Block splitter
- Compacting tool
Materials needed for the project are,
- Sub-base aggregate
- Paver blocks
- Sand
Is planning permission required for laying block paving?
No. UK’s civic and town planning laws clearly state that you do not require planning permission if you are laying permeable block paving in your driveway or garden.
However, if you are using impermeable paver blocks for the purpose, there must be an area for the water to drain off into, like a border or lawn for instance. But if there is no area for the water to run off into, any paving project larger than 5m2 needs planning permission.
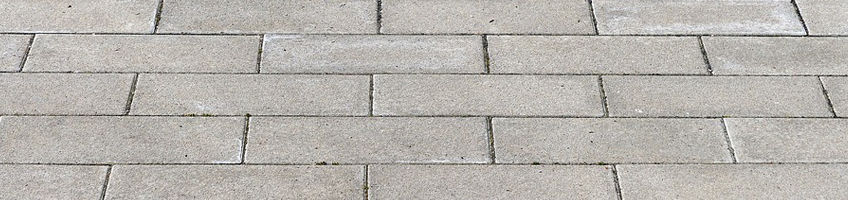
What are my block paving options?
There are two types of block paving you can choose, concrete and clay. There are advantages and disadvantages to both. While on the one hand, most homeowners prefer concrete block paving due to its lower cost and easy installation, clay block paving is far more resilient and even comes recommended by the BDA (Brick Development Association).
To make your choice easier, let’s do a quick sweep of the pros and cons of both types of block paving.
Concrete –
Pros:
- It is cheaper to buy
- It offers a wide range of shapes and textures
- It is accurately sized
- Several different block depths are available
Cons:
- It is prone to colour fading over the years
- Its aggregate material can stand exposed
- It has an expected lifespan of 20 years
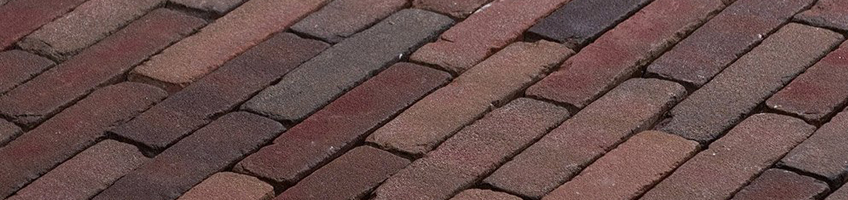
Clay –
Pros:
- It is tougher and much more durable
- Its natural colour cannot fade
- Pavers with various patterns are available
- It has a far greater lifespan
Cons:
- It is affected by moss growth
- The accuracy of sizing is lower
- It is harder to cut and difficult to work with
- Its cost per block is higher
- Block depth options are limited
Now that we know what are the things you’re going to need for executing a block paving project, let’s get down to the nitty-gritty of the actual process. There are various stages to this task and we discuss each one of them separately.
1) Preparation
Regardless of how major or minor your block paving project is or whether it is done by you or a contractor, it is always recommended to get a plan ready before you break ground. You can do this on your own or get it done from a design service. Preparing the plan beforehand fosters a good workflow and in case you’ve hired a contractor for the purpose, he knows just what you want.
The area where the paving needs to be done should be clearly marked out. It is good practice to leave approximately 300mm at all free edges as it allows for easier material handling and haunching of the edges. You can use sand, string lines and stakes or a spray marker to mark the paving area out. Also, ensure essential services like gas, cable and electricity are not affected by excavation, especially if you are doing this yourself.
2) Excavation
Once you’ve decided how much area you need to pave, it is time for excavation. How deep to dig when laying block paving is a question that many people struggle with. It is recommended to dig the designated part to a depth of around 150-200 mm. How deep you need to dig can also vary as per the land’s rise and fall. Also, keep an eye out for soft spots during the excavation and backfill them with compacted sub-base material.
The digging should be done in a measured slope so that water can run into the drainage system. When you hire a skip to remove the excavated material, beware that it grows in volume by almost 30%. As such, plan your skip hire accordingly. Remember that when it comes to excavation depth, it’s better to go deeper than shallower.
3) Edge restraints
Edge restraints border your block paving area. The blocks themselves are held in place by a concrete foundation, which gives the strength required to support the weight of people and vehicles. You can create this foundation using a concrete mix made up of six parts ballast and one part cement. After the concrete sets, lay the paver blocks on a mortar bed to serve as an edge course. A taut string line, positioned at the paving level’s finished height, should serve as a marker in the process.
The concrete should be mixed roughly 25 to 30 mm below this line with the edge course placed on top. Use the mallet to gently hammer it in and use the line to check the level. Now haunch the edging in by applying concrete on the outside till the halfway mark.
4) Sub-base
The sub-base for block paving acts as the principal support, which means the layer should at least be 100 mm thick. A 100 mm or thicker sub-base layer ensures heavier weights are supported easily.
Begin by evenly spreading the sub-base within the edge restraints followed by raking it evenly. Do this at 50 mm intervals and use a compacting plate in-between to firm the layer down. Compacting helps lay the paving blocks evenly and extends their lifespan considerably. Six to seven passes of the compactor should be enough to pack down the sub-base layers.
5) Laying sand
Now fill-up sand in the gap between the compacted sub-base and final paving’s line. While doing so, make sure you are following the slope or any other angle that you’ve chosen for the paving. When buying sand, opt for the sharper variety that is also moist enough to be easily moulded into a ball with your hands. After spreading a layer of this sand over the sub-base, use a compactor once to set it down.
6) Screeding
This is a very important step before the laying of paving blocks. The sand layer you’ve spread needs to be levelled off using a pair of screed rails (even timber works). The purpose of screeding is to produce an even and smooth surface to lay the block paving on by removing excess sand.
7) Laying paving blocks
You can begin laying the paving blocks from a corner or even the main edge of your building/house. Each block should be put to the face and glided down smoothly. Avoid bunching them together on the sand as you won’t be able to line them up. An easier way instead is to put each block in its designated place. For edges where full blocks may not fit, use a diamond disc saw or block splitter to cut a block to required size. Once the entire area has been covered, use a bar tool to check the blocks’ alignment. Finally, see if the top of the blocks is 10 to 15 mm above your planned line; this ensures the blocks can be compacted down after all of them have been laid down.
8) Jointing & compaction
After you’ve checked the blocks’ alignment and carried out cutting-ins and before you compact the blocks, you need to joint the newly paved area. Jointing involves spreading kiln-dried sand over the pavement and sweeping it into the block joints with the help of a soft brush. Compact the blocks after one round of jointing and repeat the process until all block joints have been sealed with sand. After you are done sweeping off any excess sand, your new block paving surface is ready for use.
In some cases, the jointing sand might settle down after a few weeks. You should top it up with more sand if that’s the case. And while regular maintenance is enough to keep the pavement in good condition, you can also consider using a sealant to prevent accidental staining.
How much time does block paving take?
Creating a block paving surface of average size can take anywhere between four to five days, especially if done by experienced hands. Labour is required to dig up the groundwork while vibrating-plate machines are used for the compacting process. Most of the skill and experience, as such, are required during the surface preparation and block laying stages.
Can you do block paving on your own?
The four essentials for executing a block paving project on your own are time, skill, resources and confidence. The entire process calls for a lot of patience and hard work. Moreover, it must be done right as there is no room for revisions, at least not without a sizable cost.
None of that is a worry when it comes to hiring a professional block paving service. The precision and skill with which a professional service installs your block paving surface are absolutely worth the money you pay. Most importantly, a good service also offers you a warranty on the work done. The peace of mind that brings cannot be judged in terms of money!